
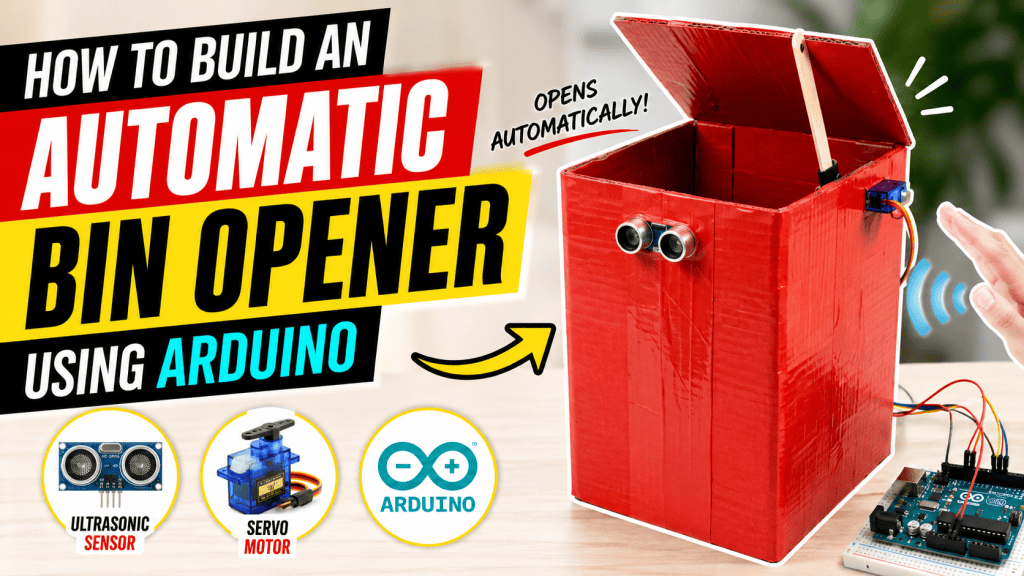
Building a touchless, automatic dustbin is an excellent entry point into electronics. It solves a practical problem—keeping your hands clean when throwing away trash—while teaching you the fundamentals of using sensors and motors.
Instead of jumping straight into wiring up physical hardware, this guide approaches the build like a professional engineer: we will define the hardware, simulate the circuit to ensure the logic works, and then build the physical prototype.
Here is the video tutorial:
Understanding Your Components
Before plugging anything in, it helps to know what each piece of hardware is actually doing in the system.
-
Arduino Uno: This is the “brain” of your project. It is a programmable microcontroller that reads data from the sensor, processes it using your code, and sends exact movement commands to the motor.
-
HC-SR04 Ultrasonic Sensor: This acts as the “eyes.” It works exactly like a bat’s echolocation. It sends out an ultrasonic sound wave (too high for humans to hear) and listens for that wave to bounce off your hand and return. By measuring how long the echo takes, it calculates how close your hand is.
-
SG90 Servo Motor: This is the “muscle.” Unlike standard motors that spin continuously, a servo motor can be programmed to turn to a specific, precise angle (like 0° to stay closed, or 90° to open the lid) and hold that position.
-
9V Battery & Barrel Connector: The power supply. The Arduino needs electricity to run when disconnected from your computer.
-
Jumper Wires: The “nervous system” that carries power and data between the board, sensor, and motor.
Wiring the Circuit
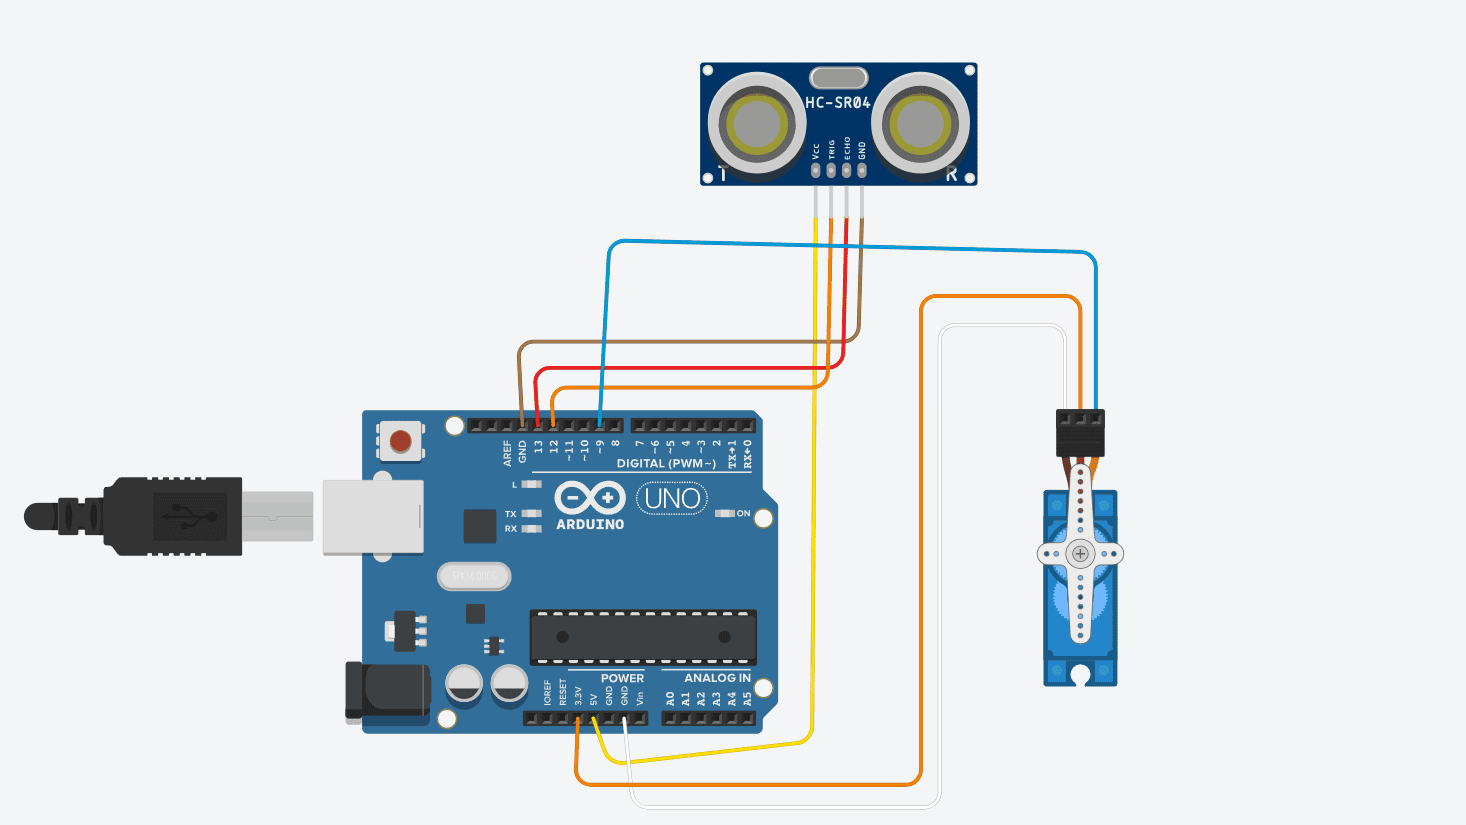
Every electronic component needs two things to function: Power (which flows in a loop from positive to negative) and Data (the instructions).
-
VCC stands for Voltage Common Collector—this is your positive power input.
-
GND stands for Ground—this is the negative power return that completes the electrical loop.
Use your jumper wires to make the following connections:
| Component | Pin on Component | Arduino Pin | What this connection does |
| Ultrasonic Sensor | VCC | 5V | Provides 5 volts of power to the sensor. |
| Ultrasonic Sensor | GND | GND | Completes the power circuit for the sensor. |
| Ultrasonic Sensor | TRIG | D12 | The Arduino sends a signal here to trigger the sound wave. |
| Ultrasonic Sensor | ECHO | D13 | The sensor sends a signal back here when it hears the echo. |
| Servo Motor | Signal (Usually Orange) | D9 | The Arduino sends exact angle commands to the motor. |
| Servo Motor | VCC (Usually Red) | 3.3V | Provides a lower 3.3 volts of power to the motor. |
| Servo Motor | GND (Usually Brown) | GND | Completes the power circuit for the motor. |
Phase 1: Simulation in Tinkercad
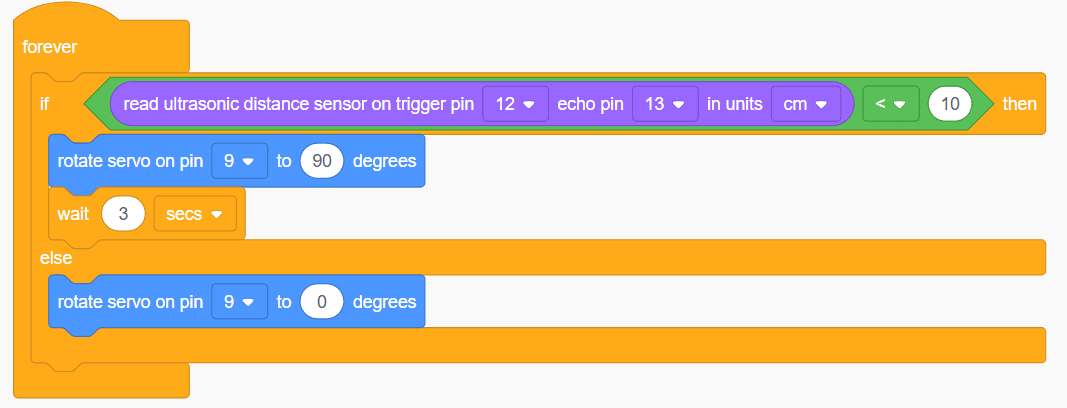
Professionals simulate circuits before building them. It prevents you from accidentally frying components with incorrect wiring and lets you test your code logic instantly. Tinkercad is a free, browser-based simulator.
Here is the code below
// C++ code
//
#include <Servo.h>

long readUltrasonicDistance(int triggerPin, int echoPin)
{
  pinMode(triggerPin, OUTPUT);  // Clear the trigger
  digitalWrite(triggerPin, LOW);
  delayMicroseconds(2);
  // Sets the trigger pin to HIGH state for 10 microseconds
  digitalWrite(triggerPin, HIGH);
  delayMicroseconds(10);
  digitalWrite(triggerPin, LOW);
  pinMode(echoPin, INPUT);
  // Reads the echo pin, and returns the sound wave travel time in microseconds
  return pulseIn(echoPin, HIGH);
}

Servo servo_9;

void setup()
{
  servo_9.attach(9, 500, 2500);
}

void loop()
{
  if (0.01723 * readUltrasonicDistance(12, 13) < 10) {
    servo_9.write(90);
    delay(3000); // Wait for 3000 millisecond(s)
  } else {
    servo_9.write(0);
  }
  delay(10); //for block stability
}
Phase 2: Building the Physical Prototype
Once your simulation works perfectly, it’s time to translate it to the real world.
Tweaking for Perfection
Real-world physics differ slightly from simulations. If the servo pushes the lid too far back (causing it to fall over), adjust the code so it only opens to 70° or 80° instead of 90°. If the lid jitters, double-check that your wires are firmly seated in the pins.